
11 February 2022
Alison Crandell, Corvus Murphy and Jaxson Karline
Introduction:
Ever since the end of the 2021 fall semester when we were first sorted into our research streams, we have been eagerly awaiting our time in lab. With the start of the spring semester and the coming of the new year, this time has finally arrived! Over this past month, our work focused mainly on reviewing lab techniques that we will use throughout the semester. These include pipetting, Polymerase Chain Reaction (PCR), and gel electrophoresis. Our goal was to accurately be able to perform these tests and interpret their results, as this will be critical in our research in the coming months.
Research:
In the past two weekly labs, our group has been using cDNA and H2O as positive and negative controls in PCR and gel electrophoresis. PCR is a process which amplifies a specific segment of DNA to a desired number of copied strands. cDNA, or complementary DNA, is synthesized DNA formed from a single-stranded RNA. cDNA is used in PCR because to amplify RNA targets, the RNA template is converted into cDNA by reverse transcriptase. Therefore, the cDNA serves as a template for exponential amplification using PCR. This also means that cDNA was used as a positive control because the expected result of DNA amplification was known in advance. For H2O, we used distilled water because it is inert or chemically inactive, meaning that it will not interact with other components of the experiment. Since it will not impact the results, H2O is the perfect candidate to be a negative control.
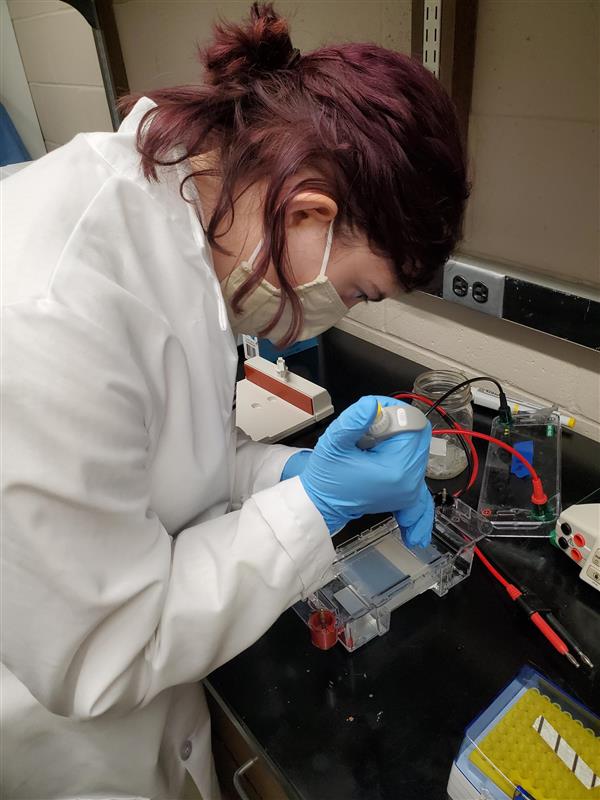
The PCR process began with creating a master mix that contained all the components needed to amplify the samples successfully. This included Quick-load TAQ 2X (DNA Polymerase), Forward Primer, Reverse Primer, and PCR water. Creating the master correctly is extremely important, as it contains the nucleotides and other components that are crucial in enabling the amplification of the DNA. A vortexer, a simple mechanism that oscillates rapidly to agitate samples, was then used to evenly mix the master mix. The master mix was then placed into a centrifuge, which spun the sample rapidly to remove the air bubbles. We continued by administering the master mix equally into two separate PCR tubes. Tube one was our negative control where the master mix was combined with distilled water. Tube two was our positive control, where the master mix was combined with the isolated cDNA.
Once the samples were both prepared, they were ready to be amplified in PCR. To do this, the samples were placed in a thermal cycler. This machine uses a process of heating and cooling to specific temperatures to create the necessary conditions for DNA replication. Hotter temperatures denature the DNA into separate strands, while cooler ones promote amplification. This cooler temperature is known as the annealing temperature, in which the primers can bind to and ultimately lead to DNA duplication. The process of heating and cooling occurred several times to exponentially duplicate the DNA. These amplified samples were then run through a gel electrophoresis.
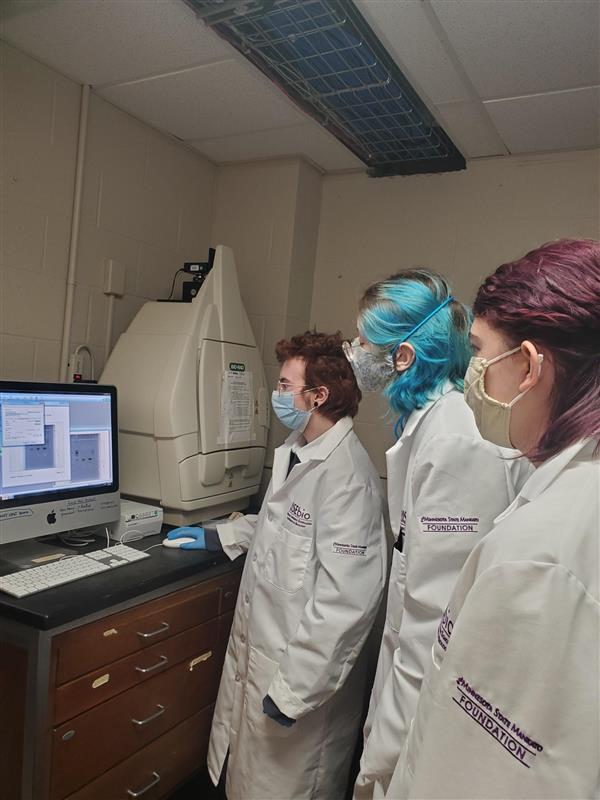
Gel electrophoresis is utilized to isolate DNA fragments in accordance with their size. To begin, an agarose gel needed to be made using agarose and 1xTAE buffer. The agarose gel contained at least three wells to allow the two PCR samples (cDNA and distilled water) and a DNA ladder to move through the gel. This process is made possible by the fact that DNA fragments are negatively charged. Since the gel box possessed a positive and negative side, the samples were injected into the wells on the negative side and allowed to move towards the positive electrode. As the DNA fragments move towards the other side, the smaller pieces can pass through the gel easier and move farther towards the opposite end than the larger pieces. Once the process of gel electrophoresis was completed, the gel was taken to an imaging machine to be analyzed. The imaging machine took a picture of the gel to compare our cDNA and distilled water to the DNA ladders. When imaging gels, the photos are analyzed by looking for solid bands in the cDNA sample and no bands in the distilled water sample. Our first gel showed signs of contamination since there appeared to be DNA in the negative control, which should not have contained any. Therefore, another run that used the same samples was performed.
Reflection:
So far, our time in the lab has been mostly successful. We ran into a few problems that needed to be addressed, but the results we have gotten have been good. One issue we ran into a few times was that the sample of H2O was contaminated during the pipetting process. This can be seen in the gel as a band of DNA in the H2O sample, which is supposed to contain none. This issue can be solved by being more careful while pipetting, which is a measure we are taking. We also ran into some issues with materials and coordination, which mostly can be attributed to us still being relatively new to working in a lab. So far, these issues have been getting progressively better with time. Overall, we look forward to continuing our work in the lab and getting more opportunities to use the new skills we have learned.