
By: Amyah Ockenga and Rosemary Hoover
The miRNA sequences that our group have been working with are hsa-miR-3135b and hsa-miR-374c-5p. Previously, we had ordered primers to amplify our RNA sequences through PCR and were able to visualize the results using gel electrophoresis. Even though we started both RNA sequences at the same time, because of error and difficulty with mRNA-374c-5p, the progress that we have made on mRNA-3135b is greater.
After already running PCR amplification twice on mRNA 374c-5p, we decided to run it one final time. During this procedure, we prepared a master mix solution that included 90 uL of PCR water and 150 uL of Q5 2X master mix to prepare enough for our microRNA amplification x 3, negative control, positive control, and one extra in case of pipetting errors. This time around, we decided to play with the annealing temperatures during PCR. Therefore, we prepared three PCR tubes that were identical including: 2.5 uL of forward & reverse 374c-5p primers, 40 uL of the master mix, and 5 uL of HeLa DNA. Along with our microRNA tubes, we created a positive and a negative control that was later used when performing gel electrophoresis. We used annealing temperatures of 62°C, 65°C, and 68°C, to see if a different temperature would allow one of the samples to show up after we imagined them on a gel.
To prepare the gel used during imaging, we heated agarose mixed with 1x TAE in the microwave and then poured it into an agarose gel casting tray with a eight column comb. Once hardened, we placed the gel into a gel tank covered with 1x TAE. Our PCR samples were then loaded into the wells of the gel created by the comb. A DNA ladder was also added into the wells in order to measure any bands that had appeared. Plugging in the gel tank to a power supply and running it at 125V allowed the slightly negative microRNA samples to move toward the positive end of the tank. After the gel was done running, these samples were able to be imaged through a computer program. After imagining this time, again, there was still no strong band in either of the three lanes. Therefore, we came to the conclusion that new primers needed to be order and the whole process for this microRNA would start over again.
Even though we had one microRNA that was giving us complications, our other microRNA, 3135b, was continuously successful through each protocol. We completed PCR and imaging on gel electrophoresis and found a good strong band. Therefore, it was time to continue on with PCR clean up. This was a very important step in order to move forward because the subsequent steps depend heavily on the purity of the PCR products. The enzymatic reactions may be interfered by the presence of residual polymerase and dNTPs, along with unused primers with primer-dimers generated during the PCR. Clean-up of the microRNA samples were achieved with a commercial clean up kit. A high salt solution denatures the proteins, contaminants are removed with a washing step, and the purified DNA fragments are eluted with a low salt elution buffer. After the samples were purified, the DNA was then quantified using a nanodrop. A nanodrop determines the concentration and if there is protein contamination or excessive salt still left in the samples. Our ratio was 1.83 which suggested that there was little protein contamination in our sample. Because of our success in purifying our product, our next step with our miRNA 3135b is to ligate the purified PCR product into the pMiniT 2.0 cloning vector and then transform this new plasmid into E. coli so that it can be amplified.
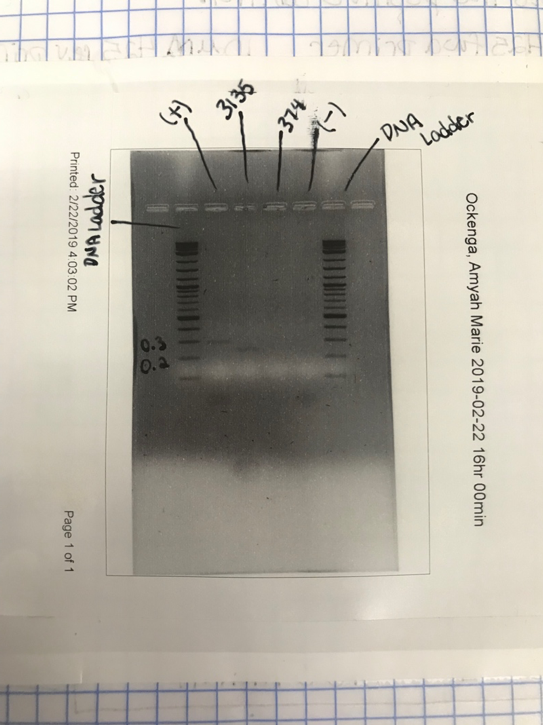
Figure 1: Results of our gel electrophoresis the second attempt when our microRNA 3135b gave a strong bond and our 374c microRNA did not show.
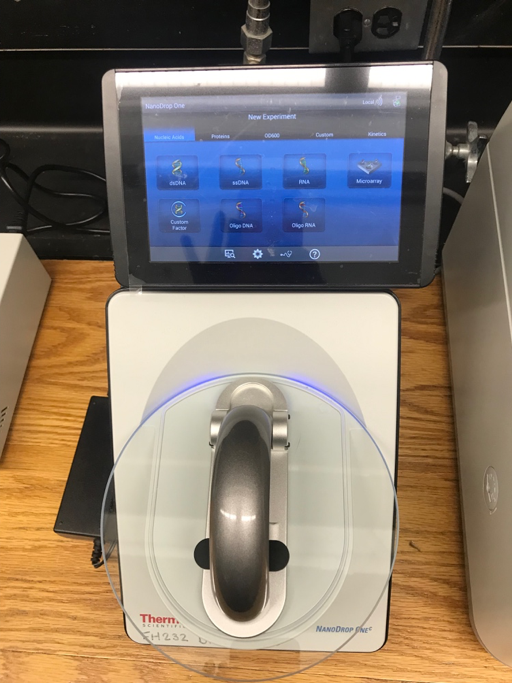
Figure 2: Nanodrop used to determine the concentration of our microRNA 3135 after PCR clean up.